Rendering Numpy data with Vapor
Vapor supports rendering 2D and 3D numpy data.
In order to pass Numpy data to Vapor, create a data set of the type vapor.dataset.PYTHON
This can also be done with the convenience function Session.CreatePythonDataset().
You can add numpy arrays as variables to that dataset by using Dataset.AddNumpyData.
These variables can then be rendered normally using any of Vapor’s renderers.
import example_utils
from vapor import session, renderer, dataset, camera
import numpy as np

ses = session.Session()
data = ses.CreatePythonDataset()
Warning: sysroot "/Applications/Xcode_12.4.app/Contents/Developer/Platforms/MacOSX.platform/Developer/SDKs/MacOSX.sdk" not found (ignoring for now).
Vapor 3.9.3
Python 3.9.19 (/opt/anaconda3/envs/vapor)
OpenGL 4.1 Metal - 83.1
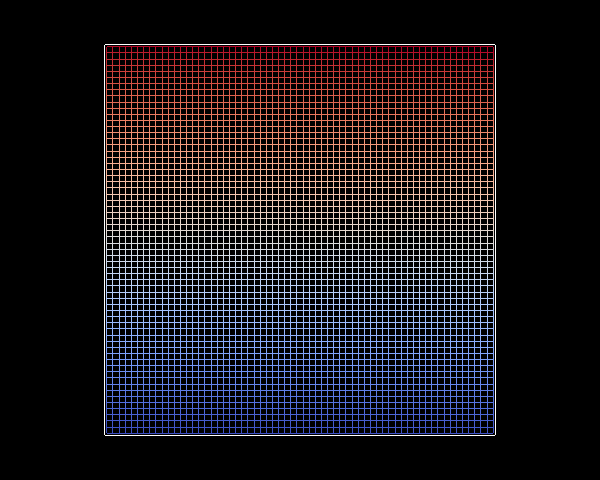
# Create a 2D numpy array and add it to vapor's dataset

np_array = np.arange(64**2).reshape((64,64))
data.AddNumpyData("variable_name", np_array)

print(np_array)
[[   0    1    2 ...   61   62   63]
 [  64   65   66 ...  125  126  127]
 [ 128  129  130 ...  189  190  191]
 ...
 [3904 3905 3906 ... 3965 3966 3967]
 [3968 3969 3970 ... 4029 4030 4031]
 [4032 4033 4034 ... 4093 4094 4095]]
# Create a renderer for the data

ren = data.NewRenderer(renderer.WireFrameRenderer)
ren.SetVariableName("variable_name")
# Show the rendering

ses.GetCamera().ViewAll()
ses.Show()